Visualise geometry
Visualise geometry
Visualising with AppCSXCad
Geometry data can be visualised with AppCSXCad which should come pre-installed with openEMS.
Important
Make sure that you have initialised the virtual environment following these instructions.
Generate your image and geometry files with gerber2ems.
gerber2ems --convert --geometryStart AppCSXCad as a bash job.
AppCSXCad.exe &Open generated geometry file
Click File > Load and select ./ems/geometry/geometry.xml in the dialog box.
View geometry file
- Enable/disable visiblity on specific layers.
- Change to 2D or 3D views.
- Snap to different planes:
[xy, xz, yz]. - Use
MIDDLE_MOUSEto pan. - Use
LEFT_MOUSEto orbit. - Use
RIGHT_MOUSEto zoom.
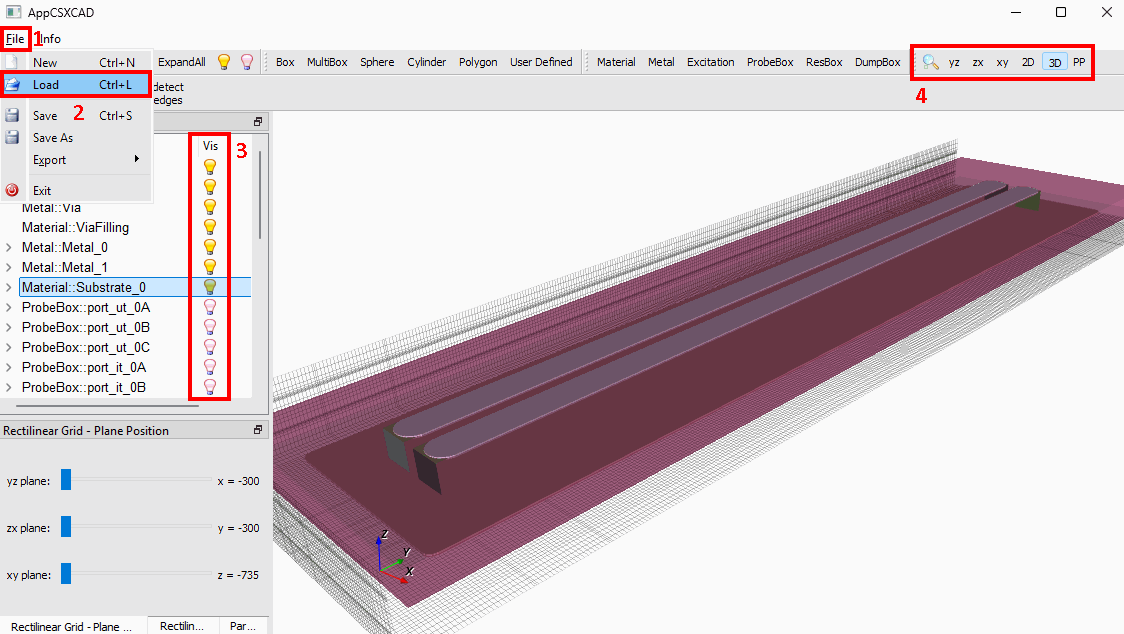
Figure 6. AppCSXCad screenshot
Visualising gerbv images
gerbv is used to convert Gerber files into images. Then nanomesh is used to convert those images into mesh data for openEMS. To view these intermediate image files follow these steps.
Convert Gerber files into image files
# generate gerbv image files
gerber2ems --convert

# generate geometry data which outputs mesh results from images files using nanomesh
gerber2ems --geometry
View images
All images are located in the specified output folder default: ems.
| Filename | Description |
|---|---|
images/{layer}_Cu_not_cropped.png | Uncropped images produced by Gerber to image conversion with gerbv. |
images/{layer}_Cu.png | Cropped images using Python Pillow to fit edge cuts outline. |
geometry/{layer}_mesh.png | Mesh generated from image using Python nanomesh for importing into openEMS. |